🌟 Unleash Your Inner Artisan with Every Stroke!
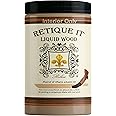
The ALLWAY GT3 3-Piece Wood Graining Set is a versatile toolset designed for creating realistic wood grain patterns on various flat surfaces. With its user-friendly triangular comb and reusable design, this set allows you to easily elevate the appearance of furniture, cabinets, and craft projects. Perfect for DIY enthusiasts and professionals alike, it offers a range of patterns including cathedral oak, pine, and cedar, making it an essential addition to your toolkit.


| Manufacturer | Allway Tools, Inc. |
| Part Number | GT3 |
| Item Weight | 6.2 ounces |
| Product Dimensions | 16.62 x 16.62 x 4.38 inches |
| Country of Origin | China |
| Item model number | Allway Tools - GT3 - 3pc/set |
| Is Discontinued By Manufacturer | No |
| Size | 1 PACK |
| Color | Plastic |
| Material | matel |
| Item Package Quantity | 1 |
| Measurement System | Metric |
| Included Components | Allway Tools - GT3 - 3pc/set |
| Batteries Included? | No |
| Batteries Required? | No |
| Warranty Description | Warranty |
J**T
Muy bueno
Justo lo que necesitaba
R**H
Amazed how well this worked
This actually works WAY better than I ever imagined. I watched several videos of ppl using this tool for the faux finish technique and was skeptical… then when the product arrived I still doubted this could work and I was absolutely wrong. This is not a beginner technique and takes a lot of practice and even longer drying time but I was impressed how easy the tool was to use and clean. I used with glaze over a painted base and the tool does leave quite a thick layer of the ‘textured’ glaze behind but once you got the imprint you want just let it dry for a week+ and don’t touch it. I only used the large head and the triangle tool on my project but I’m looking forward to trying the small piece on a future project.
S**R
Pretty convincing white wood finish
This thing is pretty cool. I redid my kitchen and initially was going to do a white paper bag type flooring, but white is not a great color to try and do a paper flooring with because you cant see any variations as you do with a colored paper, and because the white paper becomes see through once the water and glue is added which makes seeing whatever is underneath (including the other pieces of white paper overlapping which looks like complete poo).That being said, I decided to paint the entire floor white. But that just looked to plain and blah. So I then added faux grout lines using paint pens to simulate a white tile look. But it wasn't even the slightest convincing of being real tile because of the lighting and shading you would see on real tile wasn't there.That being said, I decided to give this thing a try. I repaint over some of the fake tile lines to make them into bigger slats / planks, and then used a variation of a lighter grey paint (very close to off white) with random streaks of a slightly darker grey (to give diversity across the faux planks) and I got to say...it turned out pretty amazing. I was actually surprised.A few things to mention:Since I was painting and graining in planks (one to 2 at a time) I decided not to even use a glaze. I hate mixing glaze and I found it to be very messy and increased the ultimate drying time (not just the 'working' time) substantially when I last used it on my walls. It wasn't necessary since I was painting and rolling in a short amount of time. Saved money and mess by not using it.The rolling action on these isnt the best. I feel like the roller itself is too stiff. I think it would have been easier and more effective if the lines were much more plyable and rubbery tectured. I found myself pulling too much paint off a lot of times and having to repaint and re-roll. My technique developed and it happened less as I went, but it was still happening because it was stiff. Not a huge problem, but made the project take slightly longer.I didnt use the triangle piece at all. I used a straw broom instead. Seemed less manufactured than the tool they provided.The small roller was nice, however, if I started from the one end it would just completely scrap all of the paint off. So I only used it starting at the other end (the rounded parts being at the top). Hard to describe, but you will see what I mean if you get it and try.The handle and roller and be flipped so you can start at different ends. I don't think this was described on the instructions. I just figured it out on my own by mistake, but I didn't flip it back and forth even once I did figure it out. Prob would have made even more variation if I did, but I didn't feel I needed too.A lot of people practice before they start. I don't have patience and just jumped right in. Took me a plank or 2 to get into the groove and I only had to go back and fix the first plank slightly since then. So it wasn't the end of the world to get used too for me. So I wouldn't get overwhelmed about having to practice first, but it would definitely help if you happen to have patience.and lastly, I did this on a vinyl flooring with texture and grooves in it. So it made it very difficult to even get a good action with the roller. This thing is definitely gonna give great results using it on a smoother surface. But it still turned out great in spite of this issue. Wood grain in reality is very diverse. So even messing uo (which I did often) still seems to look natural. What I noticed more than anything is that its more about the combination of paints / colors and layers which can make or break it. I first went too dark of a grey over the white and it looked very fake. starting over with a very light grey with only darker random streaks of grey made it look more realistic.In the end, I think it looks unbelievably like realistic, faux wood panels. And I have to be honest, I really wasnt trying hard as I have tried so many different things already to make the floor look decent and I was at the point I just wanted it done and over with. I know if i really took my time and put a little more effort into painting the wood grain on I could have made it look 10x better. That being said, I wouldn't confuse my floor with real wood. But those fake laminate wood grain panels...sure.I seen a video with a guy using a full on round roller with his hands. I think that would have worked much better then this quarter round grain on a stick method and I would have preferred the one he was using. But like I said, it still turned out great.I will post some before and after pictures when I get a chance.
A**L
Makes anything look like wood
First off I would like to say how much I absolutely LOVE this paint brush. It can turn anything you paint into a beautiful looking wood with the wood grain paint set. It’s so amazing to see how much it looks like actual woods grain it turns out absolutely amazing. I don’t know how it looks so realistic. So if you’re looking to do a craft project then you should really try this set.
S**B
Arrived Broken but worked
If you learn how to use these tools they are a great way to make metal or composite doors look like wood. Sadly I bought this kit for the largest of the blades and that one arrived broken. The handle connector on the back broke off. The good news is that I was still able to finish my door trim. The similar product sold at home stores has a softer silicone blade which is a bit easier to clean. The stiffness of this one was enough to scrape the under layer right off revealing putty marks. It took a bit more finesse than the soft version, and not having a handle made the wide blade harder to use but it still worked. Didn't make CoolToys TV, but for the price, worth a try.
P**S
Worked perfectly!
I searched high and low for paint for our service door to the garage, which is Metal with a wood grained appearance. It had faded badly and I found nothing in the paint department that would give the woodgrain effect. I found this tool as I searched Amazon and it worked! I highly recommend it.
S**S
This texture tool is the best thing I’ve ever bought on Amazon!
After a year spent mostly inside my house, I was ready for a change in my decor. After changing to a more neutral color palette, I wanted to refinish my aqua coffee table and accent table. I ran into two problems. First, my tables were not real wood. Second, I couldn’t decide on a color I loved. After an evening on Pinterest eyeing distressed tables and diy projects I found a tutorial using texture tools. I hopped over to Amazon and ordered this one, and OMG! Am I glad I did. No one believes they are not really distressed wood. Took about 5 minutes to get the hang of it, but luckily you can just throw another coat of paint on while it’s still wet and try again it you don’t love your first attempt. I sanded the blue a little bit and added a thin white coat of primer. Then I painted some leftover tan paint I had and used the scraper triangle thing that comes with it and let dry. Then I painted it gray and sporadically drug the tool across to get the effect. It even leaves a very slight wood texture (you could lightly sand to smooth or add poly over it if you do not want texture, but I loved it). You can also use paints closer in color to each other if you are not wanting such a noticeable grain.Note: Please excuse my terrible pictures, it looks amazing in person. I did not receive this free or get paid for a review, I just absolutely love this thing!
M**U
Great graining tool
I bought these with a fair amount of skepticism, but was really happy with the results. It made my homemade plywood and pine bookshelf look just like oak. I watched a few videos first which really helped with the application. Very pleased!
Trustpilot
2 weeks ago
5 days ago